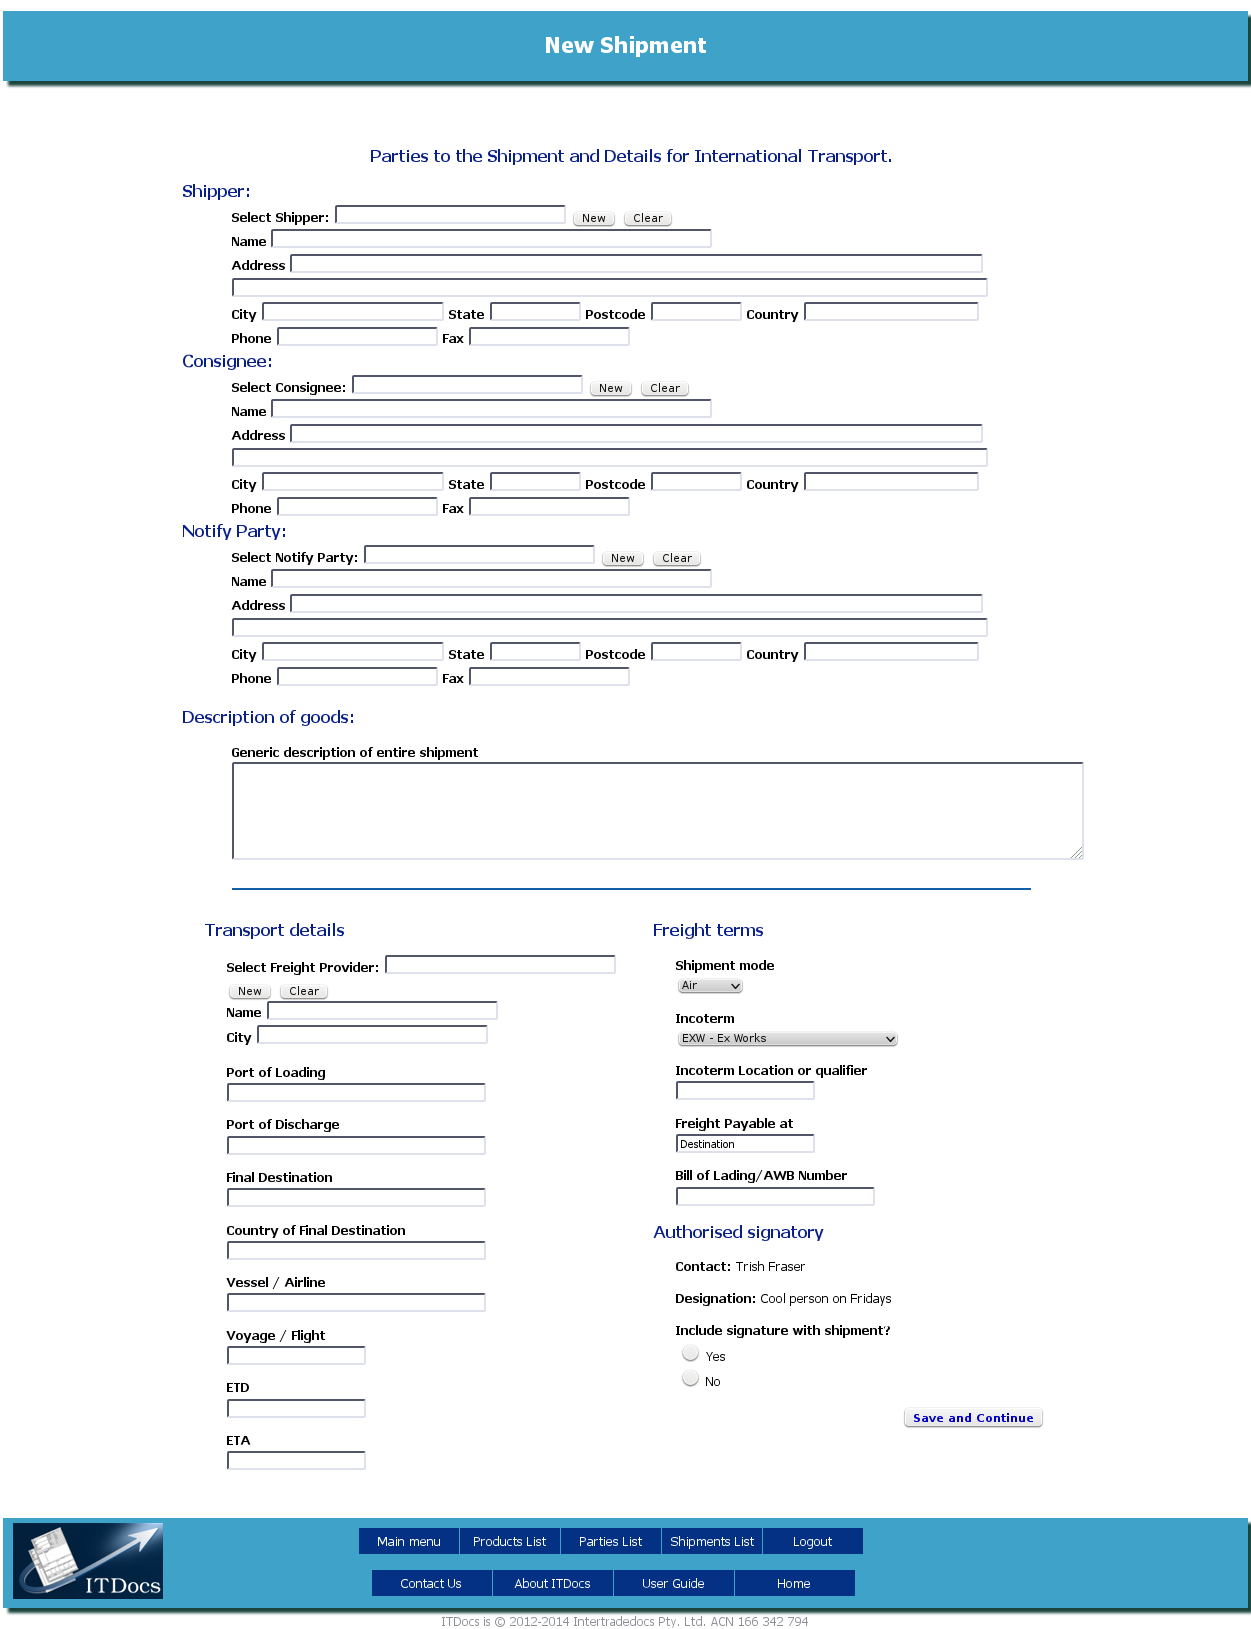
International Transport - the default Air shipment screen
To add a new Shipment, use the Navigation Bar to go to the Menu and click on the link Add a New Shipment.
The first data entry screen you will see is the International Transport screen:

International Transport - the default Air shipment screen
You must have at least a Shipper and a Consignee to complete a shipment; in some cases you will also need a Notify Party.
The Parties to the shipment should already be in your database, from when you entered them earlier. If they are there, simply click in the Select field of the appropriate party and begin typing.
You will see a list drop down, containing the names of Parties that match what you are typing. If your Party is there, click on that name and all the data for that Party will be pasted into the form.
If the required Party is not in your database, you can add the information here, by clicking New. A pop-up form will appear, and you can fill in all the relevant information. Click Save at the bottom of the form, and the data will be saved into the Parties database, and pasted into the form.
See the section Adding a party in the International Transport screen for more information.
If you have not entered data that is required (Name, Address, City, Country, Phone, Fax) you will see an error message, and the form will stay visible until you have added the required data and clicked Save.
If you find you have information from the wrong Party pasted into the form, you can use the Clear button to clear the fields for that Party and begin again.
If you need to temporarily change the details for a Party, you can edit the pasted data and save it with the form. This kind of change will only be saved with the shipment data; it will not change the data for the Party in the Parties database.
This description is used on Air Waybills or Bills of Lading, and is a very general description of the goods to be shipped. More detailed and accurate descriptions are used on the Invoice and Packing List.
The first item in the Transport Details is the Freight Provider. This is another Party, although the form doesn't require as much detail for the Forwarder as for Shipper, Consignee and Notify Party.
These fields work exactly like the Shipper, Consignee and Notify Party fields above; begin typing in the Select field and pick from the drop-down list. The details will be pasted into the form.
If the Forwarder you will be using isn't yet in your Parties database, click New to add that Party and, once that process is completed by your clicking Save, the required details will be pasted into the form.
If you are a Commerce Plus user, the following three fields must be completed in a particular way so that the data format is correct. For more details, please check the Commerce Plus section.
Enter the port where the shipment will be loaded onto the vessel or flight, and the port where the shipment will be unloaded.
When you begin typing the name of the port, a drop-down list will appear of all possible ports world-wide. Continue typing to narrow the selection. You can then choose the port from the list, or continue typing. Commerce Plus users must choose from the list, to make sure the data format is correct for submission to Customs.
The Final Destination country of your shipment must be chosen from a drop-down list. Intertradedocs will show an error message if you try to click "Save and Continue" at the end of the form, if this data is missing.
If you type the first letter of the country name, you can then either scroll further in the list or use the arrow keys on your keyboard to move to the correct country. Click on the country name to select it.
Intertradedocs does not paste the Final Destination (meaning the city or place of final destination), because this is frequently not the same as the Consignee's address city.
You will need to enter the Destination City. This field offers a drop-down list with previous entries matching what you are typing into the field; if one is correct, you can select it to save yourself typing.
You might not know these details when you first create a shipment; if you do, add those details, and if not, we recommend that you enter TBA (to be advised).
The Voyage or Flight field offers a drop-down list with previous entries, as with Ports of Loading and Discharge.
The estimated times of departure and arrival are actually dates, and these fields offer a pop-up calendar so you can choose a date.
If you don't know these dates, don't enter anything in these fields.
If you put dates in these fields and they need to be changed later, you will be able to edit them.
Intertradedocs gives you a choice of 5 shipment modes:
Air
Courier
LCL (less than a container load)
FCL (full container load, including multiple containers)
Local.
Select the shipment mode that is correct for this shipment.

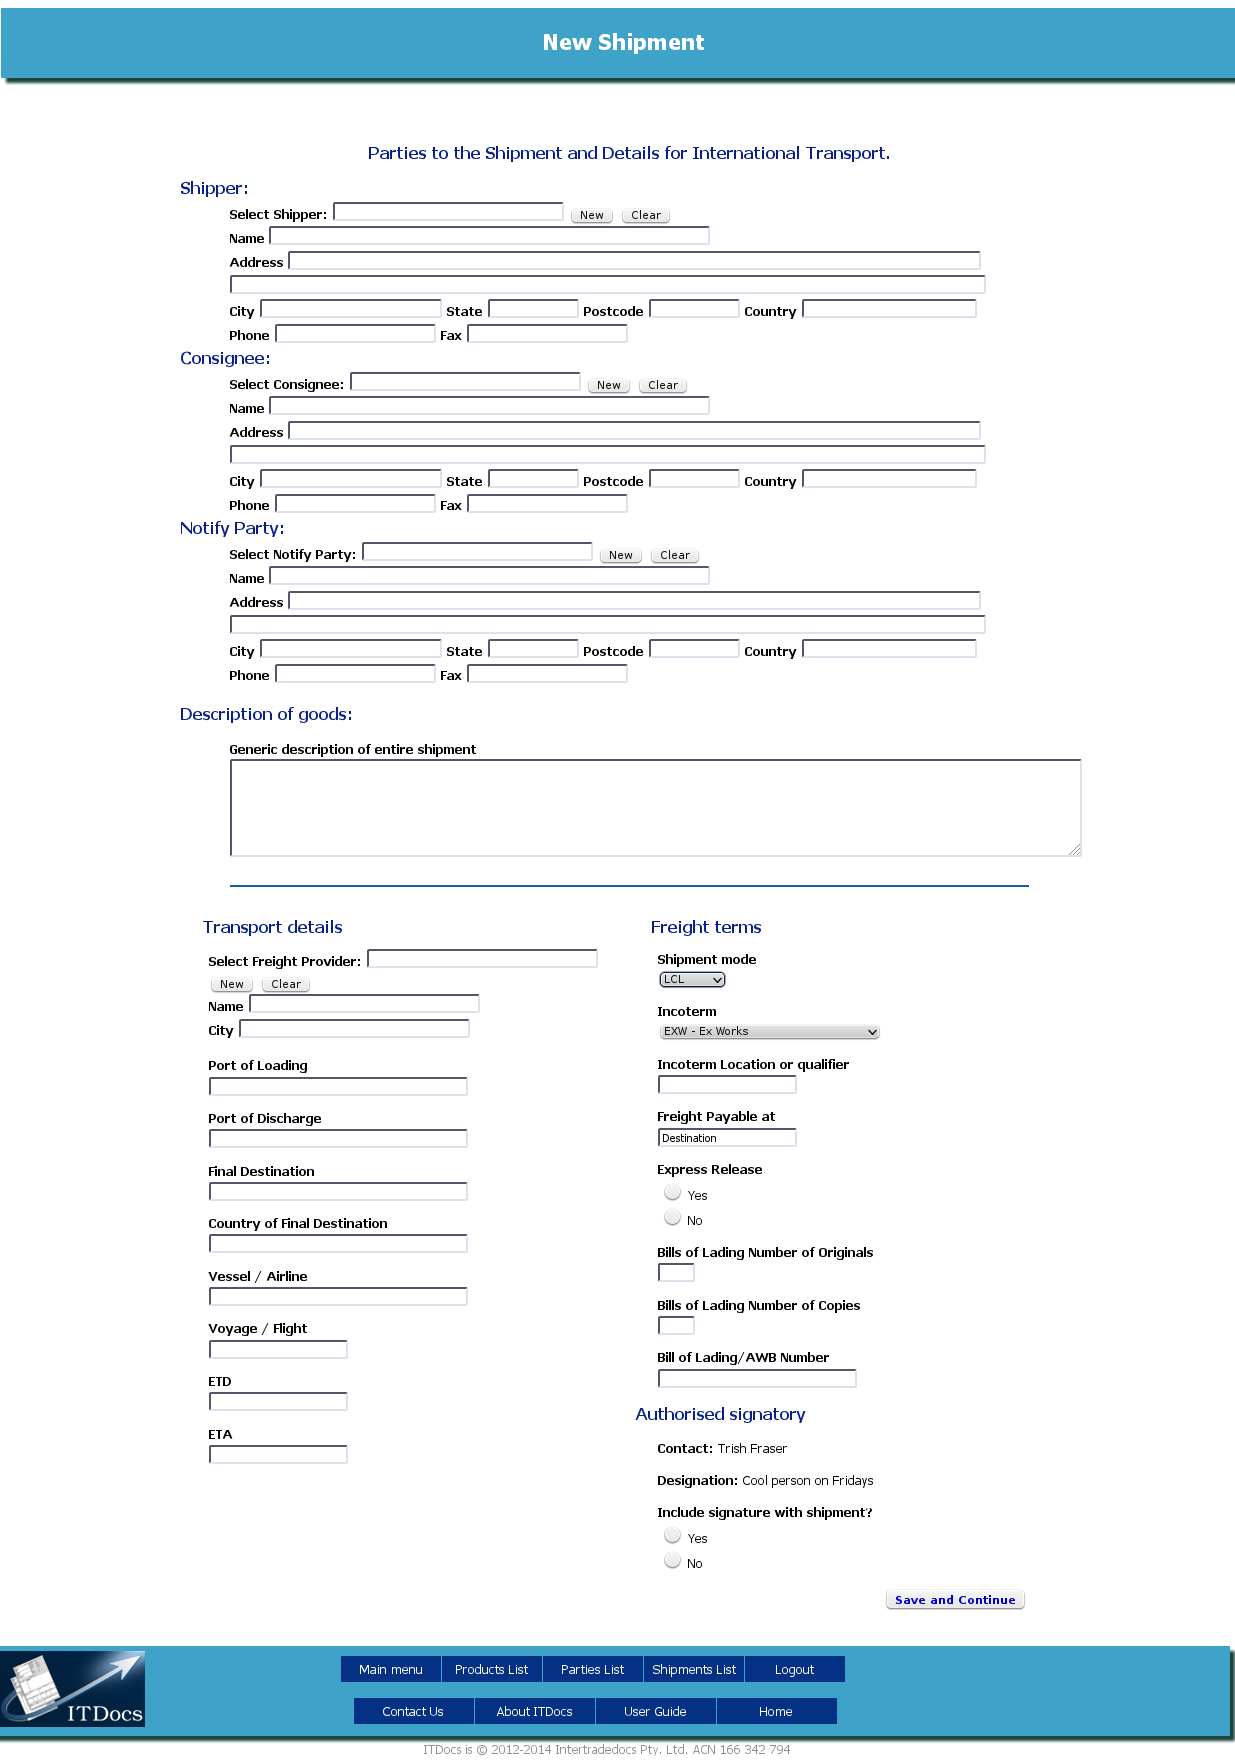
International Transport: LCL shipment showing extra fields
You will see that the default shipment type, Air, doesn't offer some of the fields that are required for seafreight - LCL and FCL. These fields appear when one of those shipment modes is chosen.
ITDocs lets you choose from 11 Incoterms, or International Commercial Terms:
EXW - Ex Works
FAS - Free Alongside Ship
FCA - Free Carrier
FOB - Free On Board
CIF - Cost Insurance & Freight
CFR - Cost & Freight
CPT - Carriage Paid To
CIP - Carriage & Insurance Paid To
DAT - Delivered At Terminal
DAP - Delivered At Place
DDP - Delivered Duty Paid
These Incoterms align with Incoterms 2010. You can find out more at Wikipedia.
Choose the correct Incoterm from the drop-down list.
The Incoterm must also have a location.
Intertradedocs pastes the Final Destination city into this field, but if this is a complex shipment, with a different Incoterm location, you can edit this field so it contains the correct location.
Intertradedocs will paste the correct term for the Incoterm in this field, but once again the field is editable if need be.
The contents of Freight Payable At must always be either "Origin" or "Destination". Intertradedocs will choose the correct one for your chosen Incoterm.
First choose whether or not you are allowing Express Release of the shipment at destination. If you are not sure, consider that with Express Release, the consignee or their agent doesn't need to present any documentation such as an original or copy Bill of Lading to take control of the shipment. It is likely that you will have agreed these details as part of the initial negotiations with the buyer.
If you are allowing Express Release, choose Yes, and the following fields will disappear since they are no longer required.
If you are not allowing Express Release, choose No, and then complete the next three fields:
Bill of Lading number of originals is the number of original Bills of Lading the consignee is required to present before the shipment will be released. This field cannot be left blank, but you can enter 0 (the number zero).
Bill of Lading number of copies is the number of copy Bills of Lading the consignee is required to present before the shipment will be released. This field cannot be left blank, but you can enter 0 (the number zero).
Bill of Lading number is the actual number of the Bill of Lading document. This number will not be available until after the ship has sailed; in the case of an Air Waybill, it will not be available until after the shipment has been booked with the airline. If you do not yet have the number, enter TBA (to be advised), which will be sufficient for the Proforma Invoice.
Here you choose whether or not you want to include the stored signature in the export documents. If you choose Yes, the signature file we have stored for the user who creates the shipment will be added to all Export Documents in the correct place.
If you choose No, the signature space on Export Documents will be left blank, and they will need to be signed by hand.
How you use this will depend on whether you are required to supply documents with original signatures (by hand) or not, and can vary from shipment to shipment.
For export purposes, the Authorised Signatory is a person or persons in a company who are authorised by the company to sign export documents as being true and correct.
In Intertradedocs, the Authorised Signatory is the person whose login is used to create the shipment. This name is written in to the data for that shipment from the moment it was created.
We are able to store an electronic signature file (an image of a user's usual signature which has been scanned) for users who have the Add Shipments role (see Roles), so that the signature will be added to the export documents automatically.
Remember to click this button! If you move away from this screen before saving, all the data you have typed will be lost.